Installation
Learn how to install your flooring with confidence.
Follow the steps below to learn how to install our flooring.
Before You Begin
Acclimation - Allow flooring to acclimate in the room for 24–48 hours before installation.
Large Rooms - For large spaces, use expansion breaks to allow the floor to move naturally.
Heavy Fixtures - Do not install flooring under heavy fixed items like cabinets or kitchen islands.
Room Conditions - Maintain indoor temperatures between 60–95°F and humidity between 30–60%.
Subfloor Prep - Ensure the subfloor is clean, dry, and as level as possible.

1
first row
Start here
Start in a corner and place spacers along the wall to maintain a 1/4" expansion gap around the room. Set your first plank tight against the spacers, keeping it straight along the wall.
2
first row
Add planks
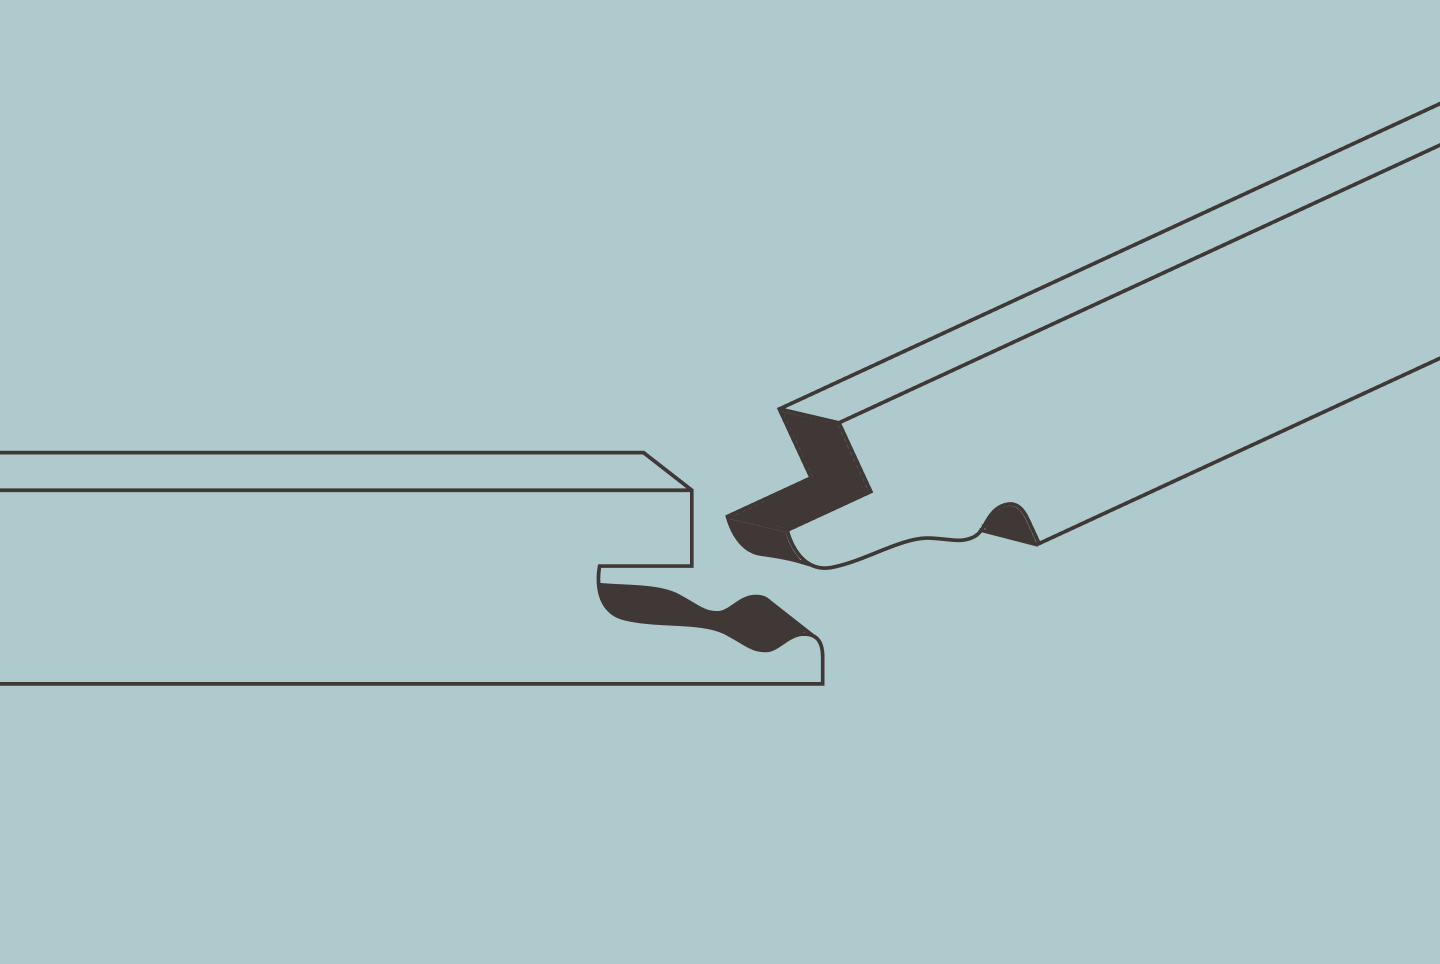
Angle the short end of the next plank into the previous plank, then push forward and fold it down to lock. Make sure the joint is tight and fully engaged.

3
finish first row
Measure the remaining space and cut the final plank to fit, keeping the 1/4" expansion gap at the wall. Install the cut piece to complete the row.

4
start the second row
Start the next row using the leftover piece from the previous row when possible. Make sure spacers are still in place along the wall before continuing.

5
second row
first plank
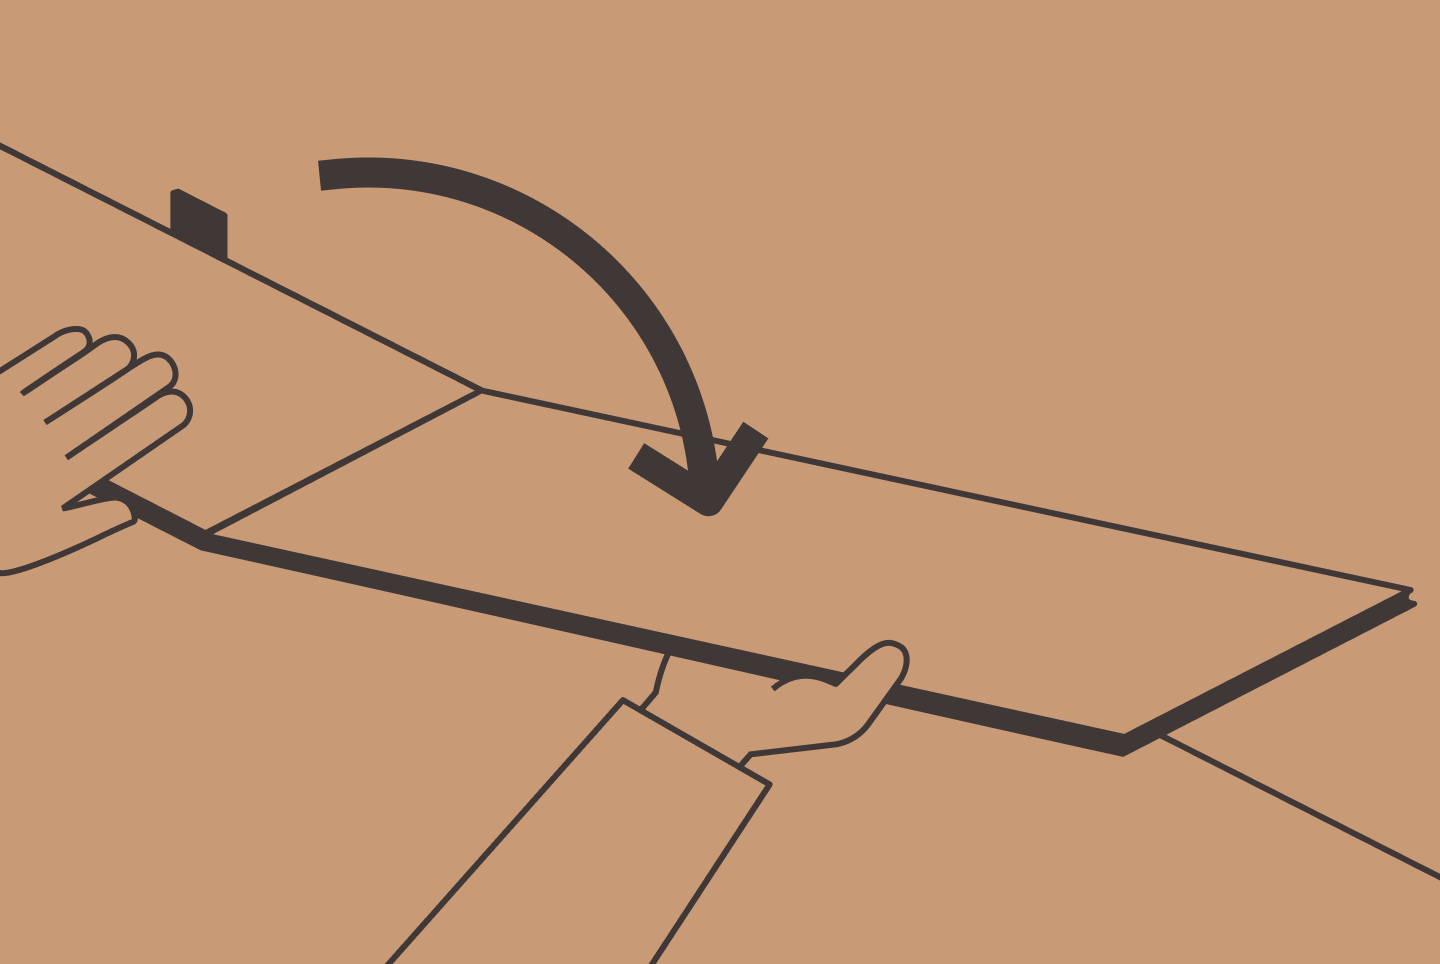
Angle the plank into the row in front, then push forward and fold it down to lock the long edge. Keep the plank slightly angled until the joint is fully engaged.

6
second row
second plank
Connect the short end first, then lift slightly if needed to lock the long edge into the row. Press down firmly until both joints are fully engaged.

7
lock planks in place
Continue installing planks row by row using the same angle-and-lock method. Always keep joints tight and rows aligned as you go.

8
cut the final row
Measure the space for the final row and cut the planks lengthwise to fit, leaving a 1/4" expansion gap at the wall. Set the cut planks into place and press them down to lock.
Meet one of our trusted distributors near you.